
![]()
CGI Advantage Employee Self Service (ESS) provides various options that allow you to customize the application to best display the data that you need to access in your day to day operations. The following topics provide information on navigating and customizing the ESS application.
This guide provides information on the features that are available in the ESS application. The navigation of this help guide is similar to the navigation of the application itself. To display help for a particular area of ESS, simply select a main tab/sub tab from the navigation bar at the top of each help topic.
For instance, if you select the Performance main tab, a list of the available sub tabs is displayed. By selecting one of the sub tabs, a list of the widgets that are located on that sub tab is displayed. When you select one of the widgets, the help for that particular widget is displayed.
You can access help for the entire application by choosing the tab and sub tab for topics which you are interested in learning more about.
This online help system uses the following typographical conventions:
|
This convention… |
Is used for these items… |
Examples |
|
Bold |
Fields Buttons Links Check boxes Menu options |
Enter your user name in the User Name field. To save your document, select the Save button. If the listing in the grid is too long to be displayed in its entirety, use the navigational links (First, Prev, Next, and Last) to move through the listing. Select the Automatically Update Application Status check box. Select History from the secondary navigation panel. |
|
Bold terms separated by colons (:) |
Cascading menus |
To view alerts, select Message Center: Alerts from the secondary navigation panel. In the above example, the user first selects the menu option Message Center. From the resulting list of options under Message Center, the user then selects the Alerts option. |
|
Italics |
Field values Parameter values Yes/No references Titles |
The Relationship field identifies your relationship with a dependent. This field cannot be set to Yes if Interest Type is set to Not Applicable or Simple. This help can also be viewed or downloaded in a portable document file (PDF) format by downloading the CGI Advantage ESS User Guide. |
|
"Double quotes" |
Sections within a document Example text |
For more information about selecting one of your appointments, refer to the "My Jobs" section of this guide. An example broadcast message is "Advantage ESS will be coming down for maintenance at 6:00 PM tonight. All users must log off of the system by that time." |
Tabs - The ESS application provides employees with data pertaining to Time and Leave, Compensation, Benefits, Performance Management, and Workers' Compensation business functions. Each of these business functions is presented as a tab in the main navigation bar in ESS.

Sub Tabs - Each tab in ESS also contains sub tabs, which organize business functions into more specific categories. For example, the Time and Leave tab contains the Time Information and Timesheets sub tabs. Select the sub tab related to the specific information for which you are looking.

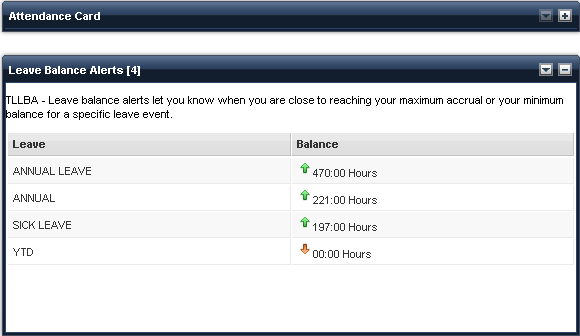
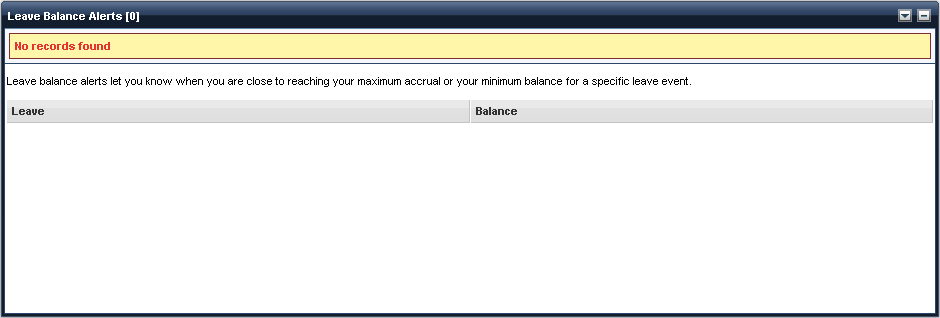
Widgets - Widgets are self-contained windows, within each sub tab in ESS, which provide visual information and/or easy access to frequently used functions. Widgets allow you to access data pertaining to specific information. For example, the Leave Balance Alerts widget, located on the Time and Leave tab, displays your leave balance information.

ESS allows you to customize the way the widgets are displayed to suit your individual preferences (if enabled at your site). The widgets on each tab can be dragged and dropped to rearrange the order in which they appear. This allows you to determine the placement order based on the information or tasks which you use the most.
You can rearrange the order of the widgets on a sub tab. The example below shows how you can move the Forms and Websites widget to the top of the page from its original location in the middle of the page.
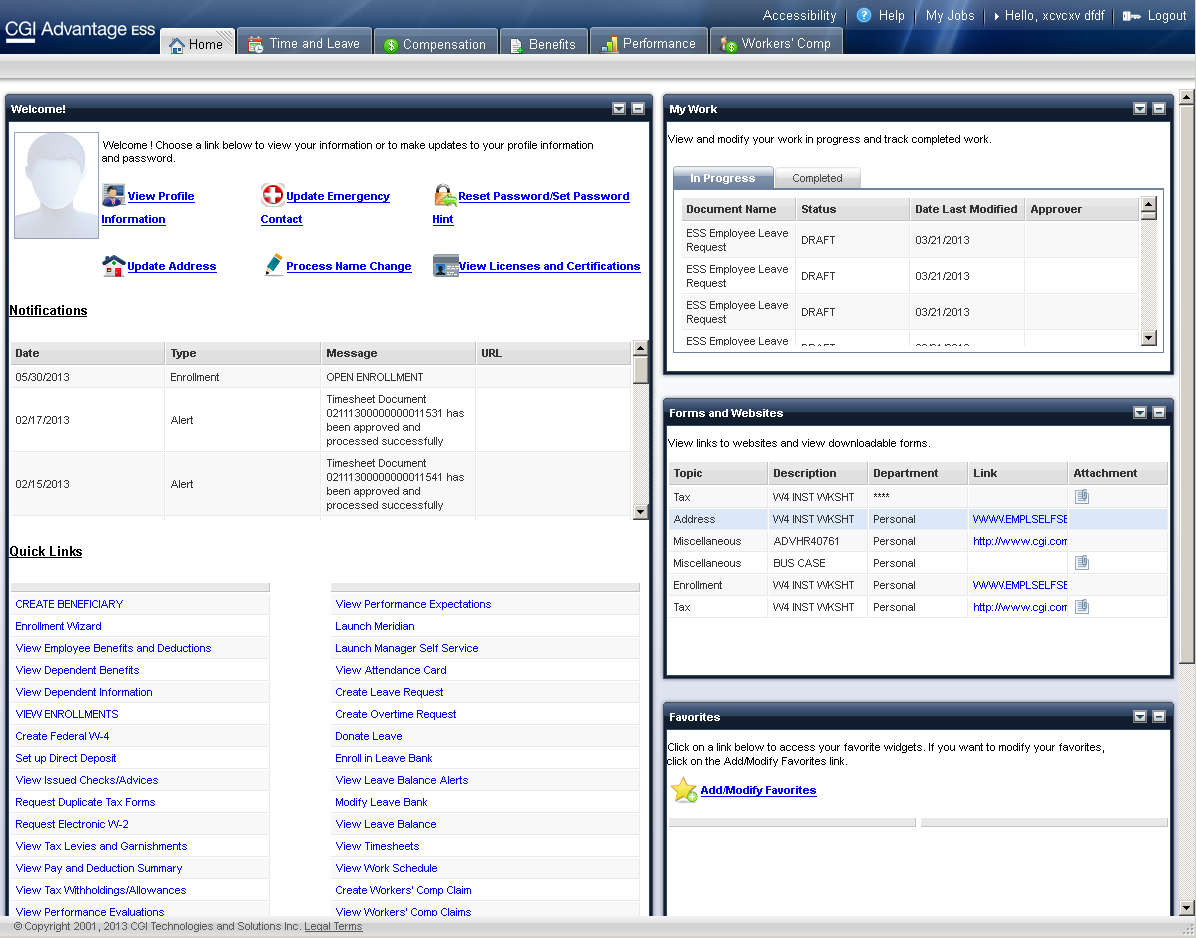
Click and hold the mouse button on the title bar of the widget you wish to move. Then while holding the button, drag the widget to the desired location on the page. As you drag the widget, the other widgets on the page will be moved to make a space for the one being moved. As shown in the image below, an empty space appears with a dotted box around it, allowing you to see where the widget will be dropped.
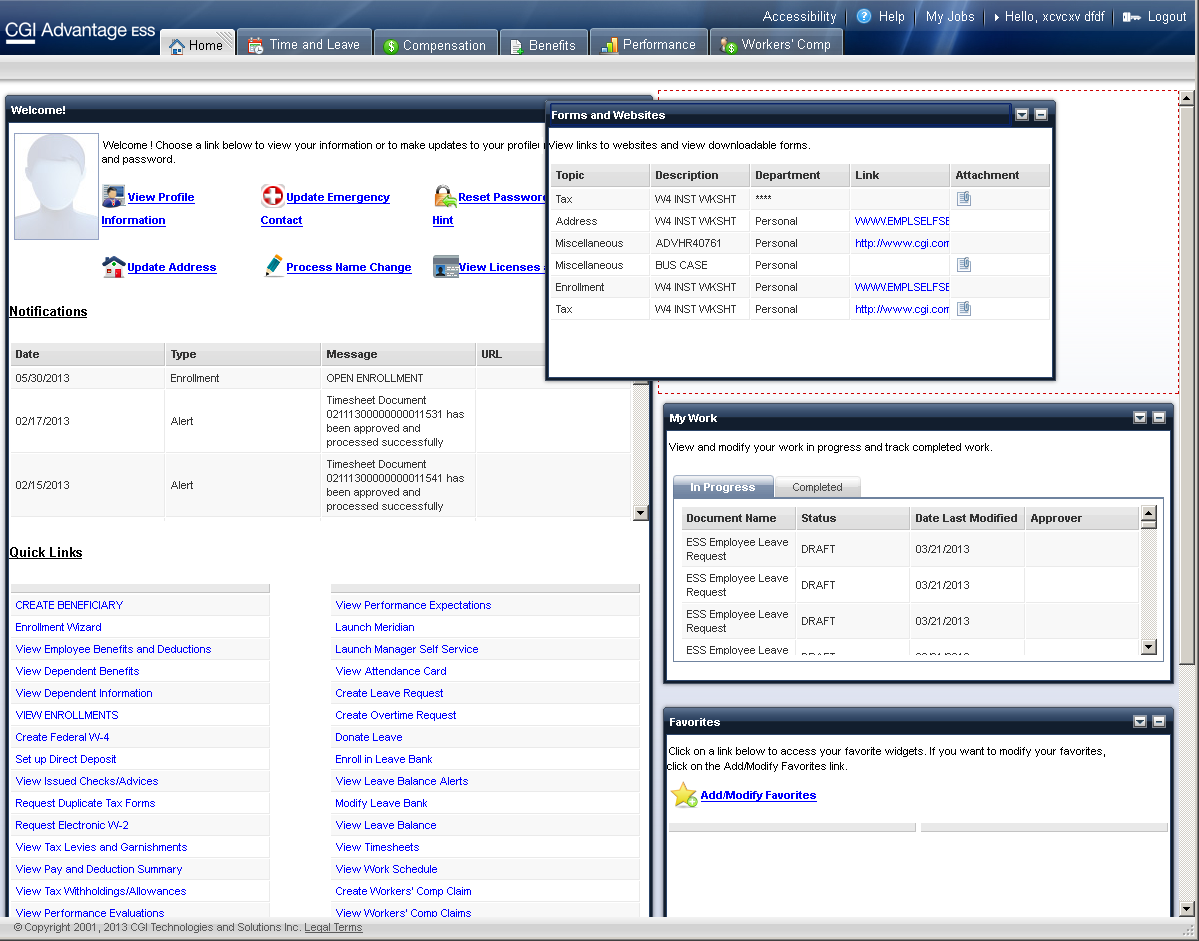
Once you have selected the new location for the widget, release the mouse button and the widget is dropped into the new box.

Each of the ESS widgets can be expanded or collapsed as desired. This allows more flexibility in the way each of the tabs/sub tabs are displayed.
To collapse a widget, select the ![]() icon at the top, right hand corner of the widget title bar.
icon at the top, right hand corner of the widget title bar.
The widget is collapsed so that only the widget's title bar is displayed. To expand a collapsed widget, select the ![]() icon at the top, right hand corner of the collapsed widget's title bar.
icon at the top, right hand corner of the collapsed widget's title bar.
The widget will be restored to it's original size.
Several widgets in ESS allow you to view detailed information in what is referred to throughout this guide as a baseball card view. Similar to a real baseball card, which displays information about a player, this view offers detailed information on the record that has been selected from a widget. Some baseball card views also allow you to take action on a particular item, such as approving or rejecting a leave request.
To open a baseball card view from the widgets that offer this option, pass the mouse over the selected record in the widget. When a ![]() down arrow icon appears, click on the down arrow and the baseball card view will be opened. Select the
down arrow icon appears, click on the down arrow and the baseball card view will be opened. Select the ![]() icon to close the baseball card view.
icon to close the baseball card view.
The baseball card view shown below represents the details of a date selected from the Work Schedule and Upcoming Leave widget on the Time and Leave tab.

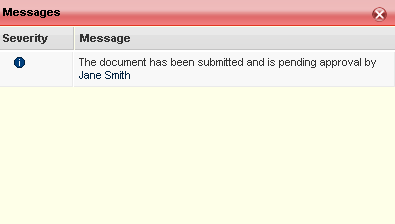
After an ESS user submits an ESS document, such as a Timesheet or Leave Request, a pop-up window will be displayed indicating that the document has been submitted and is pending approval. The display will include the approver’s name if the approver is known. If this document is routed to a workflow role, i.e., the approver is still unknown, “Pending Approver” will be displayed instead of the approver’s name.
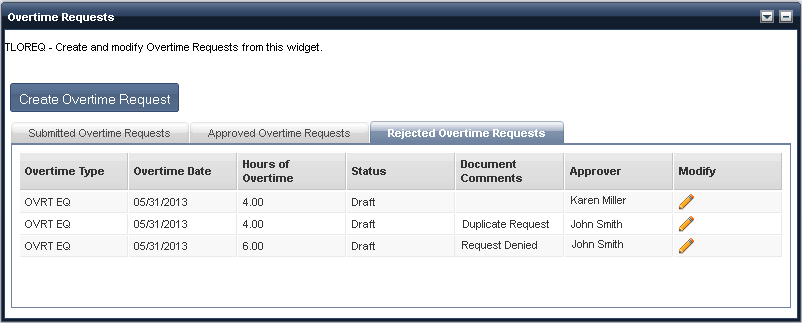
All ESS document list inquiries, such as the Overtime Requests, will display the supervisor's name to which the document has been routed for approval and the document's status.
There are Browsers and Browser helper programs/toolbars that have a function to block Pop-Up ads. However, some pop-up blocking programs cannot distinguish between a pop-up ad and a useful new window. Please be aware that the ESS application uses “new browser windows” to display the online documentation. If you are using a pop-up ad blocker program and these windows do not display, then the pop-up blocker program will need to be disabled while using the ESS application.
The ESS application provides for basic error handling in all widgets, including data validation and system /setup errors. If an error is encountered, the ESS application displays a pop up with a brief, informative message that explains the problem and how it can be resolved. The ESS application also utilizes error severity to issue both “error” and “informational” messages. An “error” message is issued when processing will stop due to the error. An “informational” message is issued when processing will not be stopped by the error. The error severity for each error type is defined by each individual widget.
In cases where data is not available, a widget cannot be loaded, or a baseball card view encounters a problem, an error message is displayed at the top of the widget. For example, in the image below, an message is displayed that indicates "No records found". This
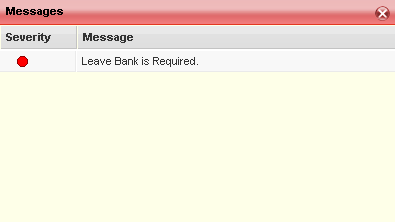
Data validation error messages are also issued via the ESS application. When a data entry error is found, an error message will be displayed in the messages. For example, this type of error is issued when a user does not enter a value in the Leave Bank field when enrolling into a Leave Bank.
Each widget in ESS has an Options menu. Select the ![]() icon at the top right hand corner of the widget to open the Options menu. Select an option below for additional information.
icon at the top right hand corner of the widget to open the Options menu. Select an option below for additional information.
Use the ![]() Refresh option in the widget Options menu to reload the data in the widget to reflect any changes that were made or to ensure that the most recent data is displayed.
Refresh option in the widget Options menu to reload the data in the widget to reflect any changes that were made or to ensure that the most recent data is displayed.
The Maximize option is displayed in the Options menu when a widget is not maximized and the Restore option is displayed when the widget is maximized. These two options toggle depending on the status of the widget's display. When you maximize a widget, it is expanded so that it is the only widget displayed on the page.
To access the widget help, select the Options drop down menu, and then select ![]() Help. The help for that widget is opened. Once the help file is opened, you can then navigate to help for any ESS widget by selecting the tabs and sub tabs shown at the top of the help topic.
Help. The help for that widget is opened. Once the help file is opened, you can then navigate to help for any ESS widget by selecting the tabs and sub tabs shown at the top of the help topic.
The ESS Overview tab provides general information such as navigating ESS, standard features, etc.
The Home, Time and Leave, Compensation, Benefits, Performance, and Workers' Comp help tabs provide information regarding the widgets which are available on each of the main tabs in the ESS application. For example, if you wish to view help on the Current Evaluations widget, which is located on the Performance tab in the ESS application, select the Performance tab shown at the top of the Help, then select the Evaluations sub tab and the Current Evaluations widget bullet. The help for the Current Evaluations widget will then be displayed.
The FAQ tab is used to track commonly asked questions from employee's regarding your organization's practices, with answers based on experience. These questions are specific to your organization's policies and procedures, such as your leave policy, performance evaluation procedures, etc. These questions are organized based on the ESS area to which they relate. Each answer, including in some cases links to other business functions, can be found by expanding the functional area and then selecting the question. If you have a question that is not listed here, or you would like to add information to the FAQ, please contact your HR administrator.
Some functions in Advantage ESS allow you to add file attachments. If allowed, a Document Attachment button will appear on the ESS document. Select the Document Attachment button, then select the Browse button to locate the file you wish to attach. Once an attachment is added to a document, the attachment name will show on the form listing all attachments.
You can also delete attachments from any documents that have not already been submitted. To delete an attachment, select the Document Attachment button. A list of available attachments for the document will be displayed. Select the attachment you would like to remove, then select the Trash can icon next to the filename.
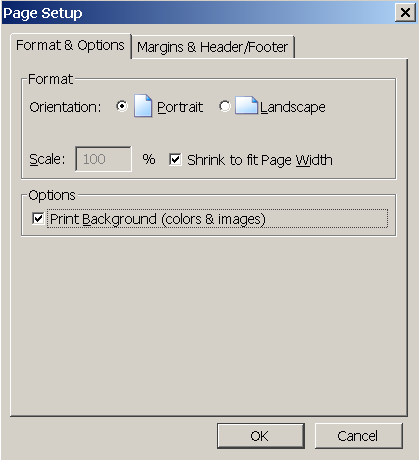
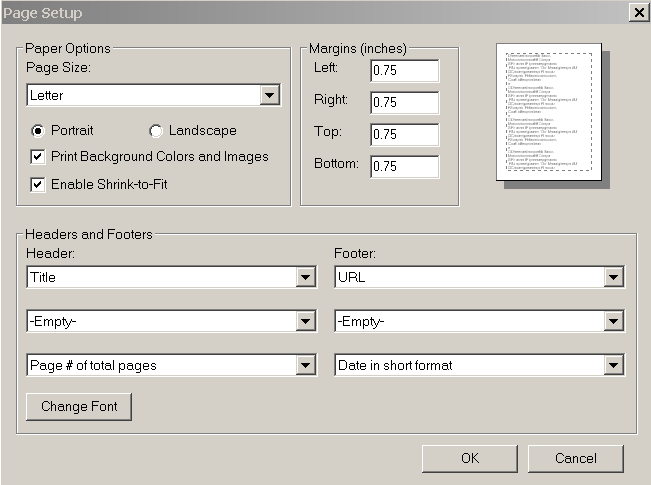
Several widgets in Advantage ESS provide the option to print the information displayed in the widget through the use of the Print button. However, in order for the colors in the associated widget to print properly, you must first select the Print Background option in Page Setup. If this option is not selected, the widgets will print without colors.
Prior to printing, perform the following steps:
From Firefox/Internet Explorer, select File>Page Setup.
From Page Setup, select the option to print the background colors and images
In Firefox, select Print Background (colors & images) and then select OK.
In Internet Explorer, select Print Background Colors and Images and then select OK.
Select the ![]() button on the widget.
button on the widget.
Appointment - An "appointment" is an employee's job/role within and organization. Some employees have more than one appointment. To select the appointment for which you wish to view or modify information, select the My Jobs link at the top right hand corner of the main navigation bar.
Appointment ID - The unique identifier for the appointment/job within the organization. If the employee has multiple appointments, the Appointment ID can be selected from the Organization Tree widget on the General HR tab.
Baseball Card View - Several widgets in ESS allow you to view detailed information in what is referred to as a baseball card view. Similar to a real baseball card, which displays information about a player, this view offers detailed information on the record that has been selected from a widget.
Documents - "Forms" used to record human resource activities (such as posting a job notice, requesting overtime or leave, timesheets, etc.).
Primary Appointment - If a person is engaged in two or more separate jobs/roles (such as a teaching position and a coaching position) the primary appointment represents the principal job/role.
Tab - The ESS application provides employees with data pertaining to Home Page, Time and Leave, Compensation, Benefits, Performance, and Workers' Comp business functions. Each of these business functions is presented as a tab in the main navigation bar in ESS.
Sub Tabs - Each tab in ESS also contains sub tabs, which organize business functions into more specific categories. For example, the Time and Leave tab contains the Information and Timesheets sub tabs. To access data that pertains to a specific functional area, click the desired tab and sub tab.
Widget - Widgets are self-contained windows within each sub tab in ESS, which provide visual information and/or easy access to frequently used functions. Widgets allow employees to access data pertaining to a specific functionality that they use on a daily basis. For example, the Overtime Request widget, located on the Time and Leave tab, provides information on the Overtime Requests that an employee has submitted.
The Advantage ESS User Guide and Advantage ESS Mobile User Guide can also be opened as a portable document file (PDF) format so that you can download them to your computer, and/or print them for offline use. Please note that you must have Adobe Acrobat Reader installed on your computer before you can view these files. Click here to access the Adobe web site where you can download this tool.
To Download the ESS Help via a PDF File:
1. Right-click on the PDF icon below. Result: A popup menu appears.
2. Select Save Target As and navigate to the directory in which you want to save the PDF file.
3. Select Save.
If you need help on opening, searching, navigating, or printing these files, refer to your Adobe Acrobat Reader documentation for instructions.
![]() CGI Advantage ESS User Guide
CGI Advantage ESS User Guide
![]() CGI Advantage ESS Mobile User Guide
CGI Advantage ESS Mobile User Guide
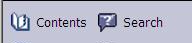
To Find Information Using the Search Tab:
Select the Search tab in the upper left hand corner of the navigation pane.
The Search navigation panel will drop down. Type the word or phrase you want to find in the search box and select Enter or Go.
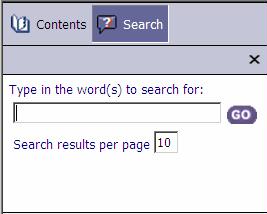
The topics in which your search criteria appear are listed in the Contents tab.
Select a topic from the search result listing in the Contents tab. Result: That topic's information appears in the right-side frame.
To enter a new search, repeat the above steps, typing over the word or phrase in your original search.
To hide the Search navigation panel, select the ![]() icon at the top of the navigation panel.
icon at the top of the navigation panel.
To Find Information Using the Contents Tab:
Select the Contents tab in the upper left hand corner of the navigation pane.
The Contents navigation panel will drop down, displaying the table of contents sorted by functional area of Advantage ESS.
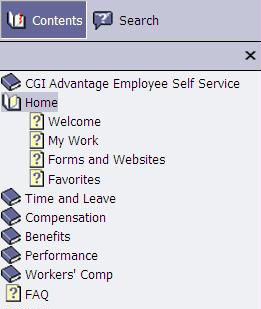
Select a help topic from the Table of Contents. Result: The right hand panel will display the selected help topic.
To hide the Contents navigation panel, select the ![]() icon at the top of the navigation panel.
icon at the top of the navigation panel.
Use the My Jobs link on the main tool bar to select the job appointment (role) for which you wish to view or modify information.

After selecting the My Jobs link, a popup window opens, displaying a list of all your job appointments. The Job Status column displays whether or not the job appointment is Active.

Select a job appointment by clicking anywhere on the appointment's line. A check mark will appear in the Select column for the job appointment that is currently selected. The selected appointment will be used to display or modify data in the system.
For instance, you can create timesheets for either your primary or secondary appointments (such as a teaching position and a coaching position) based on the selected appointment in My Jobs. If you have multiple job appointments, you will need to select the appropriate appointment from My Jobs before creating a timesheet. Once the appointment is selected, and you go to the Timesheets widget, the information displayed will be for the selected appointment.
Meridian Global and Manager Self Service (MSS) Access
Advantage ESS allows authorized users of Meridian Global and/or Advantage Manager Self Service (MSS) to sign into the applications directly from Advantage ESS. If your HR administrator allows access to one or both of these applications through Advantage ESS, a link will be available from the Quick Links section of the Welcome widget on the Home tab.
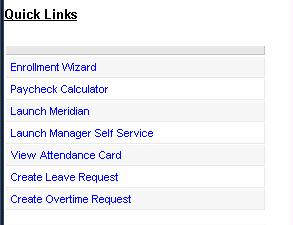
If you have a valid ID to access the application, once you select the link from Quick Links, you will be automatically signed into the selected application. You will not be allowed to access if you do not have a valid user ID for the selected application.